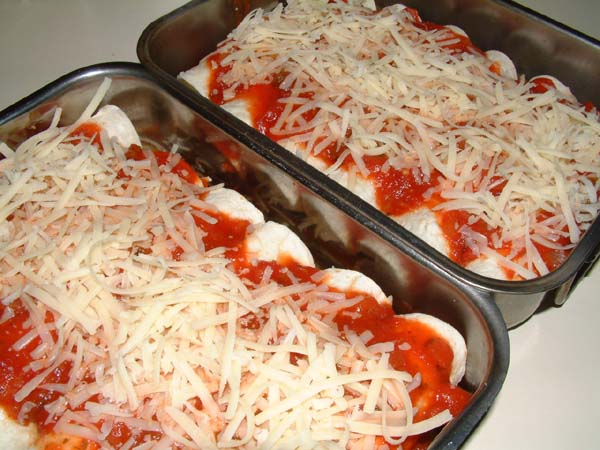
Chicken Enchiladas

Enchiladas

Chicken Enchiladas:
* Pot of water, boiling
* 3 Skinless chicken breasts or 3C of leftover, shredded, chicken meat
* 1 Bay leaf
* Mexican seasonings
* S&P to taste

* 4C Shredded Monterrey cheese (or any other cheese you have on hand)
* 12 Small flour tortillas
* Sheet of tin foil big enough to cover your baking dish
* 9×13 baking dish (or whatever you have on hand that’s clean and oven proof)
* 1C Pasta sauce
* 1C Mild or hot salsa
* 2 Tbsp sugar (to cut the acidic salsa)

* 1/8C of your favourite herb, finely chopped and placed over the cheese before plating

Boil enough water to cover the three chicken breasts while seasoning the meat on top of wax paper (cleaner, faster clean up) with the Mexican seasoning and S&P. Add to boiling water along with the bay leaf. Cover and cook till the internal temperature of each breast reaches 160 degrees. Set cooked meat aside to cool down completely before you start to shred into medium size strands of meat.

While the meat is poaching, grate 4 cups of the cheese. Cover and set aside till everything is about to be assembled.

While the meat is cooling, mix the pasta sauce with the salsa and sugar in a small sauce pan. Heat till it comes to a rolling boil. Turn the heat off and let it sit till you finish the enchilada assembly.

While preheating your oven to 300 degrees, wrap the tortillas loosely in foil, and place it in the oven for 10 minutes to heat them through. The meat by this point should be cool enough through the whole breast, start shredding it up and placing it into a bowl.

Take the tortillas out of the oven and turn the heat up to 450 degrees. Unwrap the tortillas and start your assembly of chicken and cheese in a 1.5" line across the middle of each tortilla. Top with jalapenos if you like. Wrap each one up and place in a baking dish seam side down. Make as many as will fit comfortably in the pan. Don’t overcrowd.

Top the enchiladas with your hot tomato sauce and add whatever cheese is left, place in the 450 degree oven for 7-10 minutes. You can cook them for 5 minutes and broil them for another 3 if you like your cheese to have a golden colour to it.

Plate two enchiladas per person with herbs over them, and add sour cream and guacamole on the side. Enjoy!

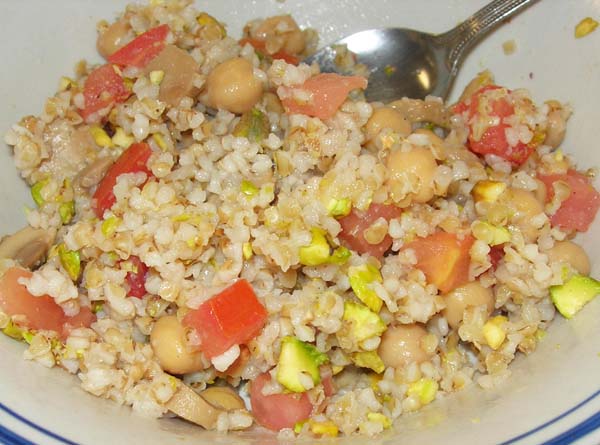
Savoury Bulgar Salad

I love bulgur. I try to make it whenever possible. Last year I was all about the dried cranberry bulgar salad from Delicious Days, but about six months ago I decided I wanted to try different tastes and variations of the same salad, so my experimenting began. What I discovered along the way wasn’t that surprising to me, really. I figured out that I didn’t like fruit or sweet foods mixed with my savoury salads. I just didn’t. Well, aside from dried cranberries. They work. I don’t know why or how, and I don’t care, because they work, damn it.

So I accepted this fact about my taste buds and my brain, and moved on to variations of savoury additions for this particular salad. I tried a lot of different ingredients, hoping each time I had found the winning ingredient that would pull it all together as well as the dried cranberries did. And guess what? It took me a few months to stumble upon the one and only ingredients I can tolerate in this salad, and a lot of tries later, but I did it! And you will understand when I tell you because it’s probably one of the last ingredients that would cross your mind too.

The magic ingredient, for my money anyway, is crushed or chopped up pistachios! Yup. There you have it, kids. Pistachios. Huh. I did not see that one coming, either. Not only does it taste delicious, it balances out the texture and colour palettes, too. Try it. You just may end up loving it as much as I do, too.

Bulgar Salad - redone

* Chicken stock (pre-made, packet or from scratch – whichever you desire)
* Chickpeas (fresh from the can and washed, or dry and soaked overnight – doesn’t matter)
* Bulgar (grain size is personal choice, but I prefer medium coarse more)
* Mushrooms (I love to add veg wherever possible, and I use the canned to speed this up)
* Tomato (one medium, diced, should be fine for 4 servings)
* Pistachios (a handful, crushed or coarsely chopped)

‘Guine In A Bottle

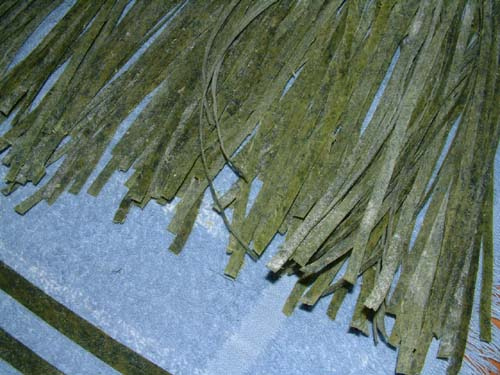
Drying out fresh spinach pasta noodles

I made some spinach pasta from scratch awhile ago, and since my brother and his girlfriend were heading down this weekend, I took the opportunity to thaw the dough out and make them some lovely linguine pasta.

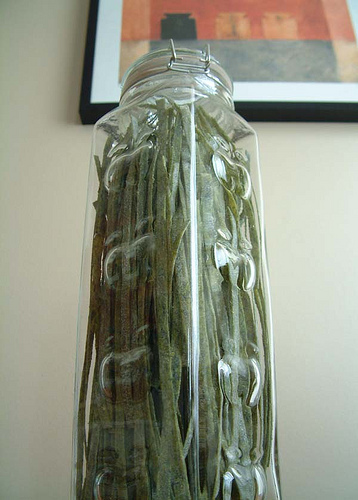
Linguine in a bottle

It should be good and tasty for them, and I made enough for two people to enjoy two meals in total. I still trying to work out how to keep the pasta noodles from arcing as they dry, but I think I might be onto something by placing my good heavy cookie sheets over them for a few hours before letting them completely air dry flat as pancakes.

Will have to try this method again a few times in order to refine the best home based method.

Eggless Zucchini Fritters

Eggless Zucchini Fritters

Zucchini fritters:
Makes four generous, thick patties. This is an eggless recipe. The moisture from the zucchini and the dryness from the homemade bread crumbs will keep them from falling apart after you chill them for at least 24 hrs.

3-4 lbs of zucchini, washed sectioned, seeded and grated
6 tbsp or more coarse salt to encourage the draining of water from the grated zucchini

Over a bowl, place a fine mesh sieve or a broad mesh sieve with a cheese cloth inside it. Place your grated zucchini in the sieve and top with the salt. Mix it up so the bottom layer gets coated in salt, too. Let it stand in the fridge over night. The next day, squeeze the zucchini mixture up against the sides of the sieve to get rid of any water that is remaining in the mixture. You don’t want it sopping wet, but at the same time, you don’t want it bone dry either. You should feel the moisture from the grates when you touch it, but your fingers shouldn’t be coated in zuke juice.

2 or 3 medium slices of stale bread (I like to use multigrain or whole wheat)
1/2 C of dried oregano, dried basil, dried thyme mixed with S&P to taste.
3 tbsp all purpose flour

Break up the break into small torn cubes into a food processor and pulse till you get a fine grind. Mix all the dry ingredients together in a bowl with the bread grinds. Toss well.

Add the zuke grates to the dry ingredients in the bowl and start kneading them together to incorporate all the dry with the wet. In the end you will have a big ball. Shape it out on a cutting board into a 1 1/2″ square and cut it into four equal parts. Take each part into your hands and start rolling it around to make a ball. Flatten the ball out on the cutting board into a 1/2″ or slightly thicker medallion. Do this for all four chunks.

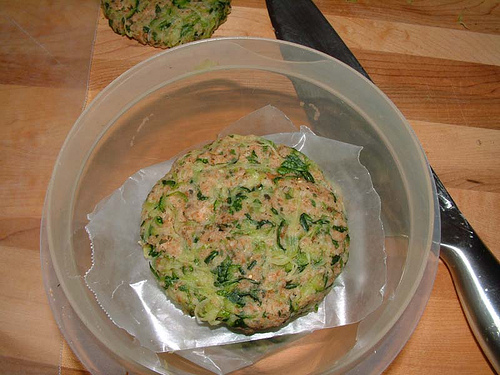
Insert one end of a thin 5″ strip of wax paper into the bowl to cover the bottom and using a bench scraper to life the patty up, place one on top of the paper. Fold the paper over top of the first patty and scrape up the second. Layer all the patties over the wax paper till the patties are all in the bowl and covered. I needed a second strip of wax paper to finish the job, but when I was done, I left the patties sitting in the fridge, covered, over night before I pan fried them in a very small amount of olive oil over medium heat.

You can also choose to use any oil you like, or Pam spray. All work well to get a lovely brown sear on each side of the patties. Pan fry for roughly 5 minutes on the first side, flip them over and cook for another 3-5 more minutes. Serve hot or cooled down plated as is or inside a burger bun.. Top with whatever condiment you like.