Basic Bechamel Sauce

4 tbsp of butter
1 small onion, small diced chunks
1/4 cup of all purpose flour
1 quart milk
2 cups cheese (can be a blend of mozzarella and cheddar, or simply use marbled cheese)

Melt the butter over low to medium heat till it’s all melted and immediately add the onions and turn the heat up a bit to medium. Cook the onions till they are translucent, and then add the flour. Stir the mixture to cook the flour into the butter and onions. When all of the flour is wet and cooked a bit, add the milk. Cook this mixture for about 8-10 minutes till the starch from the flour thickens the milk. When the sauce is sufficiently thick enough to coat a metal spoon, use a whisk in the pot to ensure all of the flour lumps are broken down before adding your cheese and folding it in till it’s all melted. Remove from heat and let stand a few minutes, or add the sauce to your casserole or entrée dish immediately.

Fairly easy, no?

What’s cookin’, Pastarella? (part 7)

So, food… Foodfoodfood. I have been busy with everything but food these days, and yet, amazingly enough, I still managed to make a few things in the last few weeks. If I didn’t have to make any of these items, I wouldn’t be typing this post out. Sad, but true. :-\

From top to bottom: Poached Pears, Vegetable Pasta Soup, Dinner Rolls, Apple Brown Betty, and Ribs Stir-fry.

While rooting through the crispers last night, I came upon four baby pears I can’t recall when I bought, so I decided last night to make something fast, simple and sweet. Poached pears fit the bill. It’s ridiculously easy to make, and you will wonder why your home ec teacher never taught this one to you in grade 8. It looks and sounds fancy, and it certainly is decadent tasting, but I assure you, anyone can make this dessert.

Poached Pears

I peeled and steamed a few baby pears in a bath of light brown sugar and margarine in the microwave for ten minutes, covered with plastic wrap. After the pears cooled a bit to handle, I removed them from the pan and plated them. To the leftover pan juices, I added a bit of heavy cream (you can use a scoop of vanilla ice cream, too), and stirred till it was well blended before pouring it over the plated pears and serving with garnish of choice. A few sprigs of mint leaves would be nice.

Lovely, sweet and fun little seasonal fruit dessert to serve on a whim. Very easy, very fast and a great use of seasonal pears.

It was bitterly cold here the other day. Cold enough for me to make some soup from scratch. I used the broccoli I didn’t roast for Thanksgiving along with some pre-cut carrot strips and onions, in some broth I made using powder, S&P, olive oil, and water to start the soup in my small rice cooker I have in the back kitchen at work. After the soup came to a boil, and my veg had cooked down enough, I added a small pinch more fresh cracked pepper and some homemade dry pasta cut into crinkle cuts. I let that sit at a rolling boil for another 7-8 minutes for the pasta to cook through before bathing in its warmth. This soup did the trick. I was no longer cold that day.
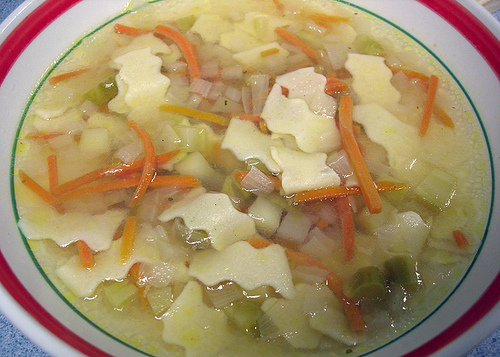
Vegetable Pasta Soup

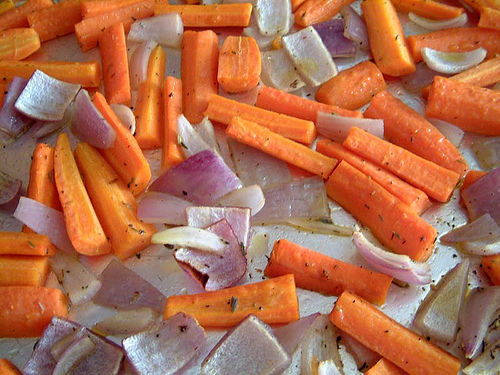
We celebrate Thanksgiving the second weekend of every October in Canada, so that means Canuck Cooks are in a position to make and post about great foods that their American friends, readers and search engines can access a few weeks in advance if anyone’s looking for ideas, inspiration or lovely Thanksgiving recipes that just work. This year my MIL asked me to bring the vegetables and I told her I would also bring the buns. She was nervous but said ok. These are the best buns I have ever made. They tasted just like the best biscuits I have eaten. DH’s whole family concurs. Must be all the butter the recipe called for. *wink* The dinner rolls and the roasted vegetables recipes can be found over at my Flickr account.
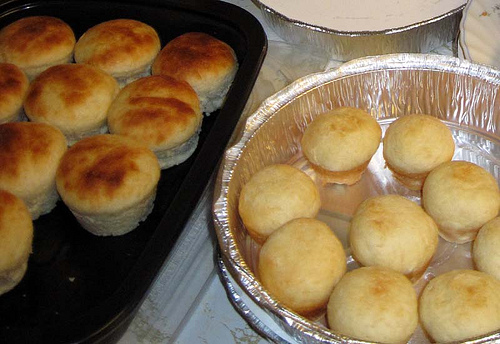
Dinner Rolls

A week or so before the mum gave us the ribs, she also gave us a huge bag of baking apples. I cored and peeled most of them to seal and freeze, but I left a few apples aside to make a dessert I love. It’s comfort food for me. I especially love the ease and speediness of making this after a long day and coming home to make dinner from scratch. Apple Brown Betty = sheer brilliance. Me love!
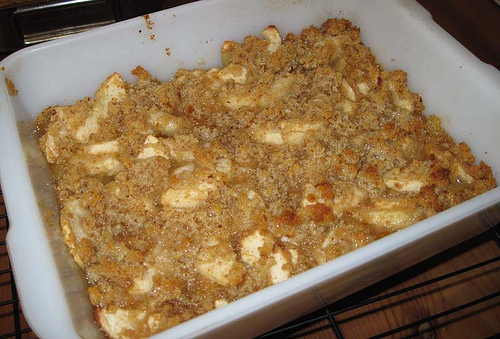
Apple Brown Betty

We stopped by DH’s parents’ for a quick visit one Sunday and they were in the last stages of making a billion ribs, so on the way out, the mum threw a few into a small container for us to use on top of the pizza I planned to make that night. And I did. It was yummy. DH was very happy. I didn’t use all of that rib meat on the pizza, so the next night I ended up using the rest of it in a stir-fry along with a bunch of aging veggies. Two birds + one stone = win-win for me.
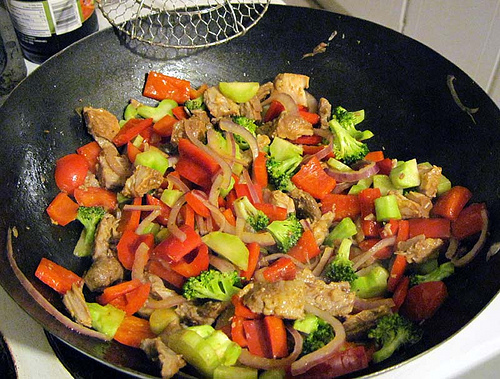
Rib stir-fry

What’s cookin’, Pastarella? (part 6)

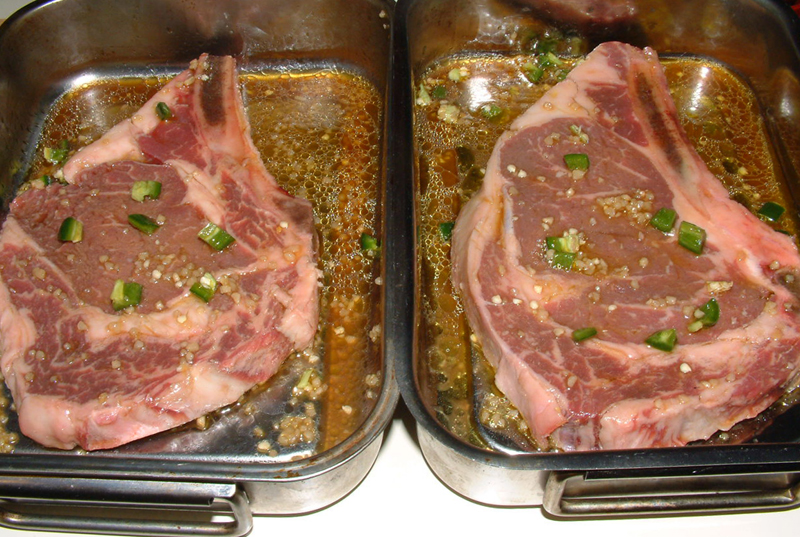
A couple of steaks I marinaded the other night in lemon juice, smashed garlic, jalapeño peppers, salt, soya sauce and olive oil. Very tasty. ‘Mmmm, steak.

Marination of Steaks

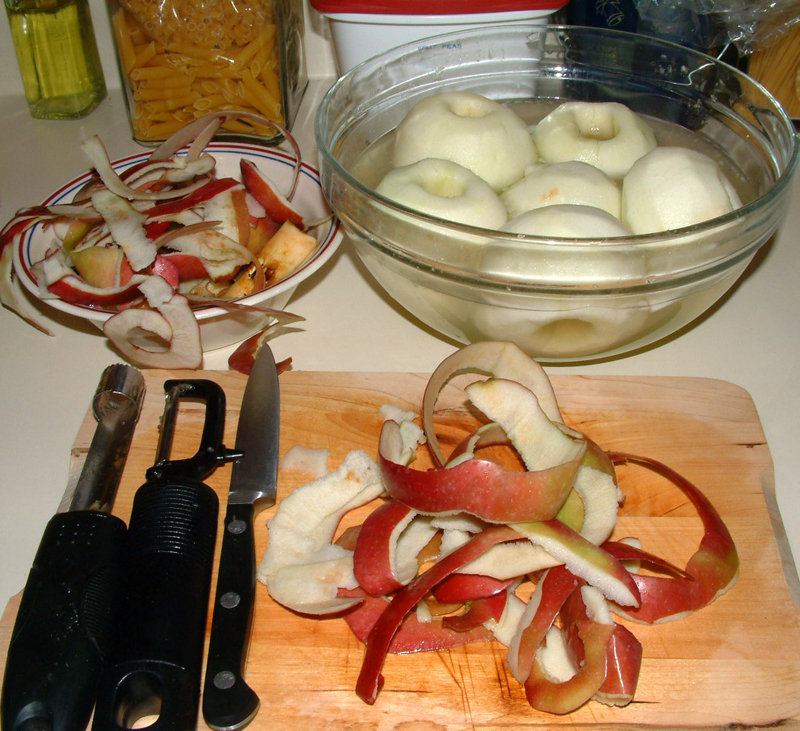
We were lucky enough to have the in-laws share their baking apple bounty with us recently. I cored, peeled, soaked, dried and vacuum sealed two huge bagfuls of slices before freezing them to use in pies, cakes, crumbles, etc. over the winter months. Lovely tasting apples, too. The bath, btw, is nothing more than water with 2 teaspoons of coarse or sea salt. The salt leaves them tart enough to stand up to the sugar they will be baked with eventually, creating the perfect balance up front.

Apple coring


Basic Oatmeal Cookies

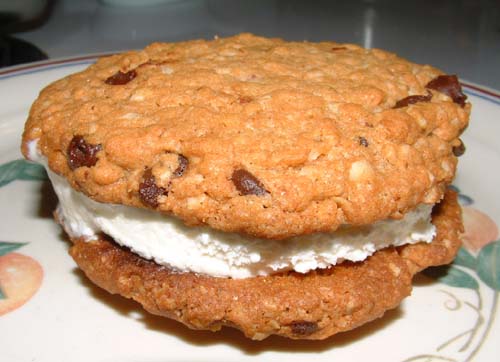
Oatmeal ice cream sandwich

BASIC OATMEAL COOKIES
1 cup butter, room temp
1 1/3 cup packed brown sugar
2 cups all-purpose flour
1 tsp vanilla:
1/2 tsp salt
1 tsp baking soda, dissolved in 2 tbsp hot or boiling water
2 cups quick oats (don’t use instant oats or oatmeal cereal)
1 cup of chocolate chips/dried cherries/dried cranberries/shredded coconut (all optional)

Pre-heat to 375 degrees. Cream butter and sugar in a bowl. When it’s creamy, add vanilla and then dry ingredients. Mix well. Dissolve baking soda in the water and pour soda water over mixture until well blended (mixture should be sticky and tacky to the touch). Gently fold in optional ingredients if using any. Don’t overmix the dough – you want soft cookies, not door stops.

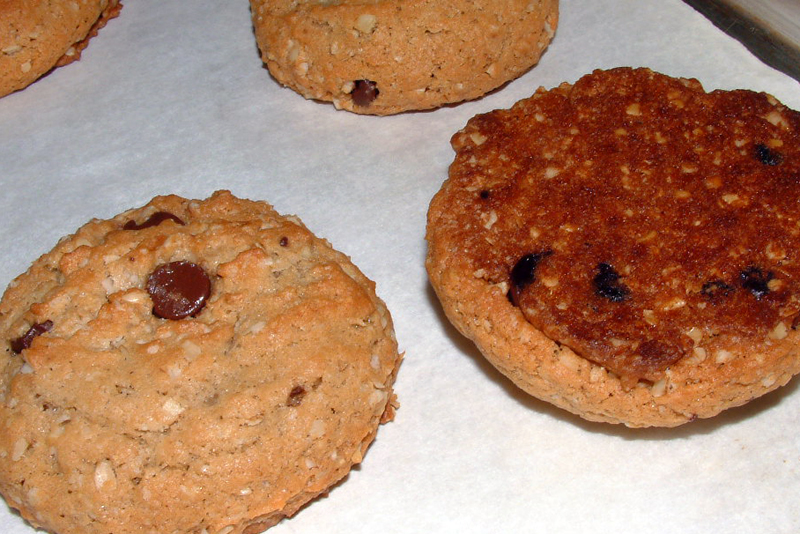
Aside: I made half the batch as soft round mounds that I baked for 15 minutes, and the other half I used the back of an offset spatula (or you can use a spoon) to flatten out each mound so they would bake in 12 minutes.

Using an ice cream scoop, drop soft mounds onto parchment paper lined cookie sheets with at least 1 1/2″ around each mound so the cookies have adequate room to spread out and enough air around each one to bake evenly. Bake each sheet for 12-15 minutes before cooling on racks. Makes 20 large cookies.

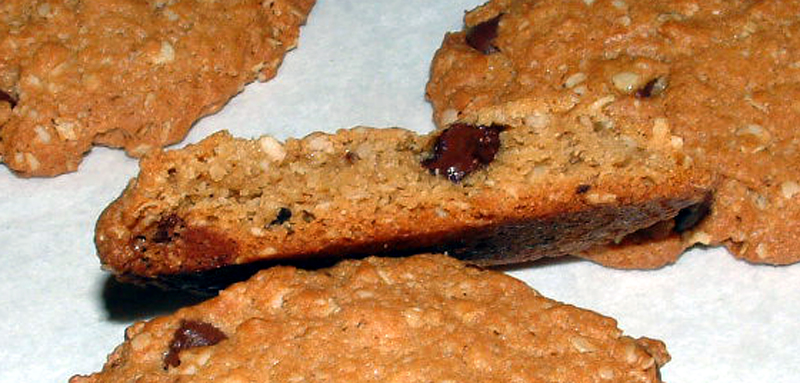
Oatmeal chocolate chip cookie

And this is an example of a micro batch:

SINGLE SERVE OATMEAL COOKIE BATCH
1 tbsp butter
1 tbsp white granulated sugar + 1 tbsp brown sugar
1/4 cup flour + 1 tbsp flour
1/8 tsp vanilla
Pinch of salt
1 tbsp. Water
Pinch of baking soda
1/4 cup quick oats (don’t use instant oats or oatmeal cereal)
1 – 2 tbsp chocolate chips/dried cherries/dried cranberries/shredded coconut (all optional)

Mix the ingredients in a cereal bowl with a fork. Use parchment paper to get a softer cookie, and for quicker clean up. Flatten the dough down a bit with your fingers or fork so the cookie bakes evenly. Bake at 350 degrees, for 12-13 minutes.

Oatmeal chocolate chip cookie

Megan’s Microwave Instant Oatmeal Cookie. Megan has posted two other variations of, not only small oatmeal cookie batches, but batches that can be made if a microwave or toaster oven. This is especially interesting to me because we don’t have a stove at work, but we do have a microwave and a toaster oven, to I’m thinking some Saturdays I might be making use of her recipes. 😀

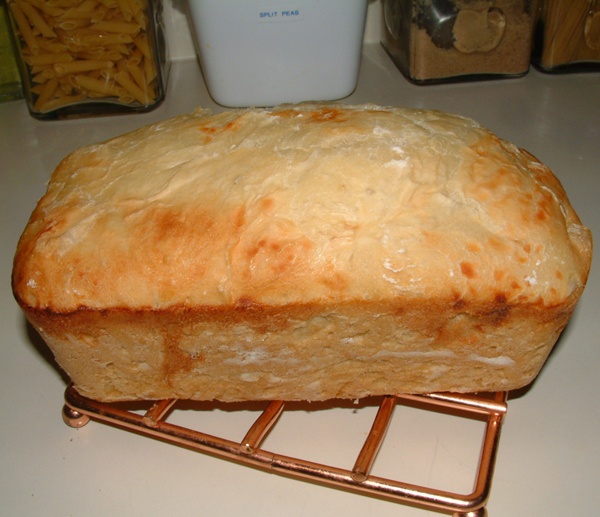
Basic Bread

Basic Bread

Basic Bread:
2 C bread flour
2 Tsp table salt
2 Tsp white sugar
1 Tsp cold butter or margarine
2 1/4 Tsp (or one 8g packet) active yeast
1 – 1 1/3C (depending upon the humidity and time of year) 120 degree warm water

Bake bread for 35-40 minutes at 425F degrees (200C). Preheat the oven for at least 20 minutes. Bread dough bakes best in really hot ovens, not cold ones.

Measure out and dump the first 3 ingredients into a large bowl. Add the butter or margarine to the bowl and start pinching it into the dry ingredients tll a small crumble forms and everything is mixed well.

Add the active yeast and mix well. Add the water starting with 1 cup first, the rest only if you need it. Using a large wooden spoon or heavy plastic spatula, start mixing and stirring the flour mixture with the water, smearing it along the sides of the bowl to incorporate all of the dry ingredients until a ball of dough forms.

Throw more bread flour onto a counter top and dump out the ball onto it. Add a bit more flour to the top of the ball and start your kneaded. This won’t take longer than 5 minutes. You will see how quickly the ball becomes springy to the touch. When that happens, and the ball is no longer wet or sticky to the touch, you’re done kneading.

Spray the same large bowl with cooking spray, going up the sides to the top rim. Drop the dough into the bowl and flip over a couple of times to coat both sides. Cut off a sheet of plastic wrap big enough to cover the bowl, but before you place it over the bowl, spray the underside with more cooking spray. This will allow you to peel it off the wet, tacky dough as it rises easily.

Set the bowl, covered, aside for 30 minutes. When 30 minutes have passed, life the plastic film and push the dough down in the centre so the dough deflates as it releases the air trapped in it. Cover the bowl with the same sheet of film and let it rest another 30-45 minutes before you do this same punching down once more.

After you punch down the dough 3 times, throw some bread dough onto the counter once more and turn the dough out of the bowl again. Lightly top the dough with more flour and start kneading it. This time you will only need to knead 2 minutes till the tackiness or stickiness of the dough disappears. Drop this dough into a baking dish or bread pan that’s been sprayed with cooking oil and lightly floured.

Cut two or three slits into the top of the dough on the diagonal or down the length to help release trapped air in the bread as it bakes. Right before placing the pan in the oven, top the dough with sprinkles of milk for moisture.

If your oven is like mine, old and cranky at high temperatures, you can create a tin foil tent to place over the bread pan while the dough bakes. Take a sheet and fold it gently in the middle down the length and place it over the pan so that it loosely sits above the dough, resting on the rim of the pan on either side.

Let the bread rest in the pan after it’s baked and taken out of the oven. Once the pan is cool enough to handle, turn the bread out onto a wire rack to cool completely before even thinking about slicing it up. This should take about a half hour. Wrap the loaf in plastic film and store at room temperature or freeze for the future. This bread is so amazing, it doesn’t last long enough in our two person household to go bad, but should it go stale, fear not for this bread will make wonderful bread crumbs for other cooking purposes.

Variations: Add some dried, crushed herbs to the dry ingredients before as you add the water. This will make lovely savoury bread that would be ideal for holiday stuffing or leftover meat sandwiches. 🙂